Rotating Banners

Photobucket Image Hosting Alternatives


Unlimited Photo Storage

A few weeks ago, we posted that Photobucket is no longer allowing users to do 3rd party hosting and hotlinking unless the users purchased an outrageous $399.99/year package or $39.99/month — essentially holding everyones images as "ransom". This has caused an uproar on the internet because images will not be shown on forums and sites unless people paid the "ransom".

Photographers and just users in general have been looking for alternatives to Photobucket. Below, we'll list out a few options and routes you can go with.
  1. SmugMug (PAID) - We have an advertising relationship with SmugMug
    SmugMug is polished, clean, professional and has a modern looking interface. It is filled with photo uploading/sharing features and even supports video hosting. Tons of customization as well as organization options are equally present but they don’t come free.

    SmugMug requires you to purchase one of their monthly or yearly plans to be able to use their services.

    • Basic: $47.88/year ($3.99/month) or $5.99/month
    • Power: $71.88/month ($5.99/month) or $8.99/month
    • Portfolio: $150/month ($12.50/month) or $20/month
    • Business: $300/month ($25/month) or $35/month
  2. Flickr (FREE/PAID)
    To upload an image or a video, you must have an account. It offers three types of account: Free, Flickrpro and Flickrpro+. If you have a free-type account, you are able to get 1TB cloud storage for free, but each photo you upload is limited to 200 MB and each video up to 1GB and no longer than 3 minutes. The Flickrpro and Flickrpro+ account frees you from any ads. With Flickrpro+, instead of paying monthly you save some money by paying for the year upfront.

    • Flickrpro: $5.99/month
    • Flickrpro+: $49.99/year
  3. ImageShack (FREE)
    ImageShack is a platform dedicated for image hosting and sharing. There is a 30 day free trial and after that, you have to pay $2/month to continue using it. You can use it to upload your photos fast and effectively, send it to social networking sites, create direct links to embed images and send pictures via email. But just like Photobucket, it is filled with advertisements and the number of images you can upload per day is limited.
  4. Imgur (FREE)
    Whether you’ve logged in or not, you can always upload pictures as you like. It offers four ways to upload pictures: browse you computer, enter image URLs, drag and drop and paste from your clipboard. Once a picture is uploaded, you will get multiple links to it, which enable you to insert the picture to any forums and blogs.
  5. TinyPic (FREE)
    TinyPic is owned by Photobucket, but you will find it much better to use. You don’t need to have an account to access its uploading function. It provides three file type options for you: Image, Video and Url. But you are only allowed to upload one image or video at a time or in a batch of up to five (5). Image shall not be larger than 1600 pixels, and video not be longer than 15 minutes. Once uploaded, the link to the image will have its own unique link. So the filename is not preserved.
  6. UltraIMG (FREE)
    UltraIMG is a free image hosting platform. UltraIMG supports almost all image formats that are currently operation in the photography industry including JPG, BMP, GIF, PNG and much more. However, UltraIMG only supports of the uploading image of up to 2 MB only.
  7. Web hosting (PAID)
    If you are knowledgeable or prefer more freedom and customizability, web hosting (ie. GoDaddy, 1&1, etc.) is an option. Price depends on the package that you choose. You will also need to purchase a domain (ie. .com, .photography). Both web hosting and domain names are purchased per year. So purchasing both, it will more than likely cost more than all the other options listed but you have the ability to create your own website, sub-domains, your email address and not have to worry about transferring images if the free site stops 3rd party hosting or jacks up the price.
If there are any sites or services that you think can help other photographers, feel free to contact us or leave a comment.


Guide: How to Buy Used Photography Gear


I'm always on the look out for photography gear and want new toys to play with. But that comes at a price...typically a hefty price. Like most people, I would love to have a brand new toy where I'm the first to touch and use it but sometimes, I don't mind used items especially if it can save me some money. Yes, it's second hand but think about the few hundred dollars that you're saving. You can put those savings towards other gear you've had your eyes on.

These are a few places you can go to buy used/refurbished gear.

Online Photography Stores
We all know who B&H Photo and Adorama are. If not, they are the two most popular go-to photography retailers to buy gear from. Both offer refurbished gear (either from manufacturer or they refurbish them themselves) or used gears from trade-ins. There are many other reputable online stores as well but not all of them sell used/refurbished items.

Online Photography Communities
  • FredMiranda — Free to join and buy. Requires membership fee to sell
  • Photography-on-the.net aka POTN — Free to join, buy and sell. Requires 30 posts and 30 day membership to see Buy/Sell forum
  • Dpreview — Free to join, buy and sell
FredMiranda, Photography-on-the.net and Dpreview are one of many community based forums. Photographers sign up to contribute and discuss everything ranging from gear, news, rumors, critique images or even show off their own. They also provide a place for photographers to unload their gear and to buy as well. None of these sites takes any responsibility for anything that may happen as it is a P2P (peer-to-peer) transaction. Depending on the site, it may have a feedback system so you can see seller/buyer feedback ratings from other people they have dealt with. If you're buying, always pay with PayPal and not PayPal Gift.

Other
We all know eBay and is a great place to buy used gear. Craigslist is another good alternative to buy used gear from local sellers and a place for you to see it in person before purchasing. Since transactions are usually done in cash, make sure to meet in a public area that has surveillance and people such as a bank, mall or a police station. It's up to you if you want to bring someone with you as well and definitely bring your camera (if needed) to ensure that the item works properly.

General Tips
You'll have people who are professional photographers to novices. You'll have gear that is babied and looks pristine or those that have taken a beating not from physical abuse but from being used a lot and they value the image more than the gear itself. Majority of the photographers that I've dealt with have a thing called "Gear Acquisition Syndrome". They typically purchase gear, use it for a little bit and sell the item to either fund other gear or to upgrade to the newest and latest thing. Sometimes, the equipment may still be under warranty.

Any purchases that you make from other sellers, ALWAYS get as much detail about the product and actual pictures of the item before purchasing. Do note that any gear that is complete with packaging will tend to be slightly higher in price than and item without the packaging.

Camera Bodies
DSLRs lose their value faster than any other photography equipment. It's kind of like a car. The moment you drive it off the lot, the value depreciates. As the older it gets, the less it is worth. Of course, once a newer model of that camera is rumored, announced or released, the older model drops in price dramatically. This is great for those looking for backups or looking for that specific camera but didn't want to pay the original price tag.

DSLRs do have a lifespan and their shutters are rated for a certain number of clicks. This doesn't mean that your camera will stop completely. It can still work past the rated number of clicks but would eventually need to be replaced. Other than checking the condition, always ask the seller how many actuations are on the shutter and not based on the number that is attached to the image. EOSCount (Canon only), Nikon Shutter Count (Nikon only), Camera Shutter Count, ShutterCounter andMyShutterCount (Nikon only) are to name a few.

Lenses
Even though camera bodies depreciates in value rather quickly, lenses usually do not. The reason for this is because they are built to last a long time and new versions don't come often. Like any item, always ask to see the condition of the item. Scratches on the body of the lens is OK since it is exposed to elements and accidental bumps are unpreventable but the most important thing is to make sure that the lens itself is flawless from dust inside the lens or scratches on the surface of the glass (both front and rear). If you have the ability to check out the lens in person, make sure that the autofocus motor still works well and zoom lenses move smoothly. If it moves freely where the lens is facing down and it automatically extends, it's no good.

Flashes and accessories


When it comes to flashes, they tend to hold in value in the used market fairly well. The drop in price is between a camera body and lenses. They don't drop in price as quick but will drop when a new version is released (which usually isn't often). If you're handy, sometimes you can buy a damaged flash that was dropped and replace the part yourself. Precision Photo and USCamera sells parts.


When it comes to light stands, tripods, camera bags, light modifiers and other items, you can get a pretty decent discounted price on the used market. There are a slew of 3rd party manufacturers and different variations that it pretty much comes down to personal preference and what people are willing to pay for them. They will definitely show signs of use but the most important thing to look for is that they are in working order and there are no rips or tears in the camera bags. From what I've seen with bags that are being sold are either barely used or never used. Most of the time, it's being sold because they've outgrown the bag by acquiring bigger and more lenses.

Refurbished/Reconditioned
Some people don't want refurbished items because it may have been damaged prior, will have damages/scuffs or think that it may have problems down the road. I personally have no problems with refurbished because they are refurbished by the manufacturer whether it be Canon, Nikon, Sony, etc. Sometimes a customer returns a product for a refund without even opening the box or using the item at all. There's nothing wrong with it, but the item can't be sold as new and has to be offered as a refurbished product—often at a deep discount (around 15 to 30 percent).

Other types of reasons products get labeled refurbished include:
  • Shipping or exterior damage: Minor scratches or dents to the product during shipment would force a retailer to return it to the manufacturer to be repaired.
  • Demo units: Demonstration units used at trade shows, retail stores, or product reviewers may be repackaged as refurbished items.
  • Opened box: Technically, there should be no issue and the item is "like new," but the box was simply opened. It may have been used slightly but otherwise works flawlessly.
  • Production defects: If a defect in one part is found, manufacturers might repair the returned defective units and sell them or send them to retailers as refurbished units.
I actually would choose a refurbished over new because refurbished are handled and checked to ensure it is working properly by a technician. With new products, its manufactured, boxed and shipped. No one is testing it to make sure it works before being put in the box. So even though it is new, it can have issues out of the box. Refurbished are not only discounted and perfectly working items but they come with warranty and sometimes the same as what a new one would have.

Make sure you're looking/getting a factory or certified refurbished. Sometimes places such as eBay or retail stores will have items that are refurbished but by the seller and not by the manufacturer.


DIY: Westcott Ice Light Using LED CREE UltraFire Flashlight and PVC


I'm sure most have heard of the Westcott Ice Light (Amazon / B&H Photo / Adorama) or seen something similar. If not, the Ice Light is a handheld LED daylight light source that offers the ability to shoot and light in tandem without the need of heavy light stands or additional mounting systems.

The biggest issue is that the Ice Light is very expensive...$500 expensive! But what if you can get an Ice Light without burning a hole in your wallet? We have a cost-effective Do-It-Yourself (DIY) alternative that would serve the same purpose as the Ice Light but at a much more affordable price.

Below is a comparison between the Westcott Ice Light and DIY Ice Light:

WESTCOTT ICE LIGHT DIY ICE LIGHT
Price
$500
$25+
Lamp Type
LED Array (dimmable)
CREE LED T6 (High, Medium, Low, Strobe, SOS)
Lumens
1,160
Approx. 1,000
Color Temperature
5200~5400K
6200~6500K
Beam Angle
72.6 degrees
up to 360 degrees
Power
Built-In Lithium Ion 7.4v Battery or Input 100-240v AC/DC Power
Removable Lithium Ion 18650 3.7v 3000mAh Battery
Battery Life
60 mins at full power
6+ hours on full brightness
Battery Charge Time
2.5 hours
4-6 hours
Mount
Handheld with 1/4-20 inch thread (both ends)
Handheld with 1/4-20 inch thread (one end only - optional)
Lifespan
50,000+ hours
100,000 hours (replaceable)
Item Diameter
1.75"
1.5"
Item Length
20.25"
17.5" (18.5" with flashlight protruding)
Item Weight
1.3 lbs.
1 lbs. (including flashlight)

As you can see, both has its pros and cons. Plus, if you're not using or ever decide you don't need the DIY Ice Light anymore, you can still use the flashlight.

Continue reading for a list of what you'll need and instructions on how to make your own DIY Ice Light. We also list some optional modifications as well as other Ice Light alternatives that we thought about.


Camera Tips: 12 Photography Tips


In this day and age, more people are taking more photos than ever before and they're sharing them online with friends and family in record numbers. One of the most complaints I see online are that people blame the camera if the images aren't as nice as those you see online taken by other photographers. If you follow a few of these guidelines, you can improve the quality of your photos without having to purchase a higher priced camera. By purchasing a new camera, the pictures may still come out the same. There are also some useful information such as what is ISO?.

1. Composition - This is the most important rule in photography. This is the heart of a photograph. The easiest rule of thumb to learn and remember is the Rule of Thirds. Basically, you'll want to break your frame into nine squares of equal size. You'll want to try and align the subject of your photo along these lines and intersections and imagine the main image divided over these nine boxes. By using this rule of thirds rule, this will give you a more dramatic and visually interesting shot instead of your subject being dead center of your photograph. Many newer cameras have a rule of thirds grid overlay that you can activate when shooting. This will make things a lot easier rather than having to figure it out in your head.

2. Exposure Compensation - If you are shooting on a mode other than full manual mode, your camera will determine the "correct" exposure for the photo. In other words, it will decide how light and how dark the shot should appear. The camera looks at the scene and tries to determine the appropriate exposure based on the correct lighting on a 18-percent gray card which is why there are also special scene modes such as for snow. Without these special scene modes, the camera would try to make the white snow look gray.

If a photo is too light or dark, there are a few other scene modes that are available to play with. You can also play with the exposure compensation. Many cameras have a physical button identified by a +/- symbol. If your photo is too dark, move the scale up above zero. If too light, move it down a bit until you feel its perfect.

3. Modes - There will be scores of shooting modes ranging from automatic to very specific scene modes. For fast action shots, you can put the camera in Shutter Priority (S) mode and increase the speed—setting it to 1/125 second or faster will help to freeze action. If you're in a building or outdoors where there is low light, you can use the Aperture Priority (A) mode to make sure as much light as possible enters the lens. If you're doing landscape shooting on a tripod, you can increase the depth of field by keeping everything such as foreground and background, sharp and in focus. If you're more advanced or have the knowledge of what exposure, shutter speed and aperture, you can use Manual (M) mode.

In addition to aperture and shutter, ISO plays a major role in photography. Read our tip for more information about ISO.

4. Lighting - Besides composition, you also have to pay attention to how much light is available and where it's coming from when you're taking pictures. Too much light in the background can cause your subject to become dark. If you're taking a picture of a building and you don't have the flexibility to relocate, you can use the camera's flash to fill in shadows. Depending on the lighting outside, you may have to manually activate the flash, as the camera will think that it's unnecessary on a bright day.

5. Flash - Many people tend to use flash too much. This will result in over-exposed images and nothing but pure white-out. If your subjects look too white, you're too close. If you're too far, your subject won't be lit by the flash. I highly suggest purchasing an external flash that goes on the camera's hotshoe. The built-in flash on the camera is not strong enough to light up your subject from a distance. Read our tip on how to do flash photography.

6. RAW or JPEG - This is a debatable topic. Some photographers prefer JPEG and some prefer RAW. Honestly, it's personal preference. JPEGs are compressed images with your camera settings embedded. RAW is just that. It's a raw file that has settings and layers attached. So when you import RAW files into a program such as Adobe Lightroom to post-process, you can adjust settings in the image without affecting certain areas. If you post-process a JPEG image, everything will change. Since RAW files are uncompressed, the file size will be larger compared to a JPEG file. Some cameras even allow you to save file formats. Of course, your memory card will fill up quicker.

7. Memory Cards - Memory cards play a major factor. Without these, you can't store images. There are many different types. The most commonly used memory cards are Secure Digital (SD) and Compact Flash (CF). Majority of cameras including pro-sumer cameras (higher end consumer model cameras but not quite professional) will use SD cards as it has become a standard. Higher end cameras such as for professionals will use CF cards or both cards.

Storage capacity can range between 4GB to as high as 128GB*. Depending on your cameras megapixel and your settings and composition of image, your image size can vary in size. As a good starting point, you should pick up either a 4GB or 8GB card. Some people like to store images on their cards so you'll need a bigger card and some like to transfer images to their computer after each shoot.

You can perform a stress test on your memory card before using to ensure it doesn't fail on you while you're taking pictures and risk losing all the pictures you've taken. If your card does become corrupt and you need to try and recover your images, you can follow our tutorial on how to recover images.

*as of this post, this is the biggest size available. As technology improves, storage size will increase.

8. Tripod or Monopod - Although we may think we're still and steady, we're not. Some of the best shots you see on the web is done with a tripod or monopod. It also comes in handy when you want to take that group picture of everyone including yourself by using the camera's self-timer without someone behind the camera pressing the shutter button or handing the camera to a stranger. There are many affordable products on the market and there are expensive models. I highly suggest getting a decent setup but without breaking the bank if you do photography as a hobby. Don't forget to factor in the weight of your camera and the tripod would need to be able to hold that weight.

If you want portability, a monopod is what you would look for. A monopod is what it sounds; a tripod but missing two of its legs and leaving only one. This will help you stabilize your shots without having to take time to setup.

9. Camera Straps - If you're going to be carrying your camera for a long period of time, you want to be comfortable. Using the included camera strap that came with your camera, its the typical neck strap. You hang the camera around your neck and the camera hangs in front of you. This puts a strain on your neck and back. Some photographers extend the length of the stock strap as long as possible and places the strap across the body like a sling. Not only is this uncomfortable but a hassle to access when you do need to use the camera.

For some suggestions on camera straps, be sure to check our full array of reviews on camera straps.

10. Camera Lenses - The camera itself plays a factor in how your pictures will turn out but majority of your investment in photography is the lenses. There is a reason why a lens can cost as much if not more than what it costs to buy a camera body. For a beginner, a 18-55mm kit lens (typically included with the camera) is OK. Its great for capturing images of your family and for vacations but when it comes to being creative or being able to take pictures in low light situations, that is where you will need to invest in better lenses with lower aperture (f1.8-f2.8).

There are macro lenses which allows you to focus on very close objects that can fill the frame. I personally prefer a lens with a fixed aperture (f2.8) because whether its 70mm or 200mm, it will be the same and will allow more light in. For lenses that have an aperture of f3.5-5.6, the aperture can vary based on the focal length. For example with the 18-55mm, at 18mm it will be at f3.5 but when you zoom to 55mm, it will automatically jump to f5.6.

11. Be Selective - You can easily take a few hundred photos within a few hours of shooting. With social media and online image sites, you don't want to upload everything. Some can be blurry, poorly composed, out of focus or duplicates. Spend some time and eliminate images you don't like. Be sure not to look through your images while you're shooting. What most people do is look at the preview on the LCD after each shot. Not only is this bad because it becomes a habit, but while you're looking at the screen you can be missing a great shot.

12. Post-Process - Not all pictures will be perfect. You'll have to crop, color correct, adjust exposure, remove red-eye and other basic editing tasks. Just performing the very basic editing on a photo can help improve the quality of the image. Cropping an image can help with composition and allow you to rotate the image so that the horizontal lines are straight. Such sites such as Picasa, Imageshack or Photobucket can help assist in post-processing.

If you want to take it the next level with more control, there are such programs as Adobe Lightroom [Amazon | B&H Photo | Adorama] that can do more advanced editing.

Purchases:
All your camera gear whether it be camera bodies, lenses, tripods, memory cards, programs and whatever you can think of, can be purchased from AmazonB&H Photo and Adorama. I suggest these places not only for warranty purposes because they are authorized dealers but for their return policy as well. Of course, there are other authorized dealers but shop around and see who is giving the best offer.

If you want to save more money, sign up for Mr. Rebates for cashback. You can save an additional 2%-5% on your purchase depending on online store. For more information about Mr. Rebates take a look at our guide.


Camera Tips: Camera and Lens Warranty Information


As I browse various photography forums and look at marketplaces whether its looking for deals or selling my own gear, potential buyers usually ask for a copy of sales receipt for warranty purposes (if there is any time remaining). There's also been online deals and people question the manufacturer warranty from a non-authorized dealer.

Some people say that warranty is not transferable, whether or not a manufacturer will repair under warranty or some just don't know if the product they purchased or about to purchase is eligible for warranty. This article will help you get a general idea and a better understanding of each manufacturer's stance on warranty and what to look for if you want full manufacturer warranty.

If you don't have any warranty and feel you can make the minor repairs, I've also included information on how and where to purchase replacement parts.

*NOTE: I am not customer support or representative for any of the manufacturers mentioned in this article. Any information in regards to warranty is information gathered from online forums, information provided on the manufacturers website or warranty cards that come with products and/or personal experience.

If you have comments, want to share your experience or have additional information that you would like to contribute, let us know and we'll update this article. I will be updating this article as more information become available.

Continue reading for detailed information from each manufacturer.

What is "Gray/Grey Market"?
Generally, a manufacturer works with a single importer who can sell and support their products in a given region. The importer usually has local dealers and distributors who resell the imported products; this is called a "distribution channel". Gray Market refers to merchandise that is imported and sold by methods other than these normal channels.

For local safety regulations and certifications (FCC, CE, UL, etc.) and government requirements a manufacturer provides special packaging (manuals in the appropriate language, power cables designed for the local receptacle, etc.) and product engineering designed to meet local codes. Manufacturers also have service and support agreements with the authorized importer.

Gray Market items are not designed to be sold in a particular market and cannot be supported by the authorized importer because they may not meet mandatory safety and certification codes. Because these items are not designed for a particular market they may not function properly, or the authorized importer may not be equipped to provide service, support or software.

With the opening of international borders and the use of the Internet to sell goods, Gray Market equipment has become extremely common in the photographic and consumer electronics markets. Many different types of equipment are brought into North America for sale without the proper documentation and US consumers do not always know what they are purchasing.

Because the resellers' cost is less they can sell Gray Market items for less. Unfortunately this price savings is only on the initial purchase; because service and support is more difficult to obtain it may end up costing the consumer more in the long run.

General Rule of Thumb:
1. Always buy from authorized dealers such as Amazon, B&H Photo and Adorama, if you want warranty. Camera manufacturers usually will not accept warranty repairs unless it's purchased from an authorized dealer.

If the deal was just too good to be true, it probably was. One of the first indicators that a piece of merchandise might be Gray Market is if the price is considerably less than most other resellers.

Camera manufacturers also will not repair gray market items. If you have a problem with a gray market item, you'll have to send it back the reseller or importer for warranty claims. Doing this will cost a lot and longer wait time due to shipping overseas.

2. If buying from Amazon, item must be "Ships from and sold by Amazon.com" (as shown below) in order to have valid warranty.


Amazon's marketplace (3rd party sellers) tend to be non-authorized dealers or an independent seller. If you're unsure if the 3rd party sellers are authorized dealers, take a look at the list of authorized dealers in the PDF provided by manufacturer (below).

3. If buying an item from an eBay, the seller must be an authorized reseller (as shown below). If you're buying an item from a seller who's a normal eBay seller or an online store that is not an authorized reseller, there is no valid manufacturer warranty. Be aware that some sellers will claim there is US Warranty but read the description and fine prints carefully in the auction before purchasing. The warranty may be from a 3rd party (at additional cost) or sellers store warranty and not from the manufacturer.

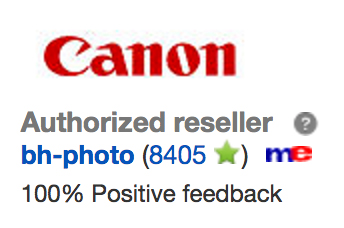
Example of Authorized Dealer/Reseller:

If you purchased on eBay from an authorized dealer such as Adorama, you still qualify for any rebates (if available) and manufacturer warranty because they will provide you with a store receipt/invoice to be used as proof of purchase.

Example of Non-Authorized Dealer/Reseller:

Non-authorized dealers may provide you with receipt/invoice for warranty but manufacturers may not accept them since they are not authorized dealers. Some may just give you PayPal invoices, which are not valid proof of purchases.

4. The following is basic warranty information. It's generally the same across the board with most manufacturers but it may vary slightly:
  • The limited warranty is only effective upon presentation of your Bill of Sale or other proof of purchase. The Equipment is warranted under normal, non-commercial, personal use, against defective materials or workmanship as follows: Parts: Defective parts will be exchanged for new, remanufactured, repaired and/or recycled parts for a period of ONE YEAR from the date of original purchase. Labor: For a period of ONE YEAR from the date of original purchase, labor will be provided free of charge by our factory service centers or designated service facilities located in the United States. When returning Equipment under this warranty, you must pre-pay the shipping charges, and you must enclose the Bill of Sale or other proof of purchase with a complete explanation of the problem. During the ONE-YEAR warranty period, repairs will be made and the Equipment will be return-shipped to you free of charge. For repairs after the warranty period is over, you will be given an estimate of the cost of repair and an opportunity to approve or disapprove of the repair expense before it is incurred. If you approve, repairs will be made and the Equipment will be return-shipped to you (shipping charges apply). If you disapprove, we will return-ship the equipment at no charge to you.
  • Warranty does not cover loss of or damage to the Product due to abuse, mishandling, improper packaging by you, alteration, accident, electrical current fluctuations, failure to follow operating, maintenance or services performed by someone other than manufacturer, or an authorized service provider for the Product. Without limiting the foregoing, water damage, sand/corrosion damage, battery leakage, dropping the Product, scratches, abrasions or damage to the body, lenses or LCD display.
  • Warranty does not cover use of parts or supplies (other than those sold by the manufacturer) that cause damage to the Product or cause abnormally frequent service calls or service problems.
  • Warranty is not valid if the Product has had its serial number or dating altered or removed.
  • Warranty usually does not cover any included accessories.
  • Warranty exchange or replacement does not extend the original warranty period of the Product.
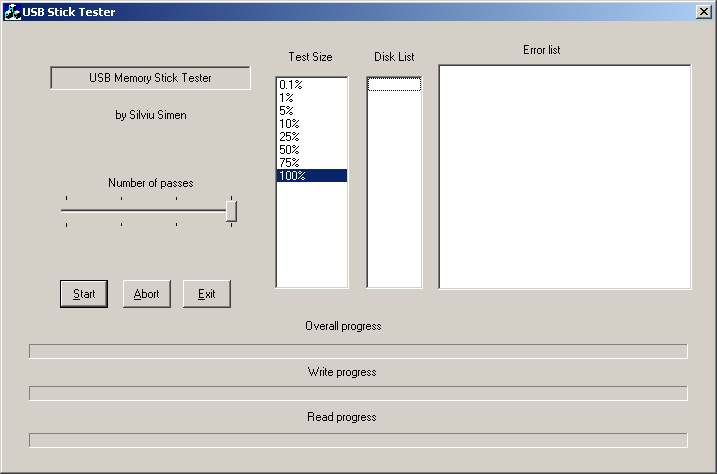
5. If you're handy and looking for replacements parts to replace yourself, you can order parts from the following places:
  • USCamera [Canon | Nikon]
  • PrecisionCamera
  • Canon Service Parts (866) 481-2569
  • Nikon does not sell genuine parts to customers and ended their Authorized Repair Program (as of March 2020)


Complete list of Canon Authorized Dealers

You may obtain technical support for your Product as follows:
  1. E‐mail support via our Web site at https://www.usa.canon.com/internet/portal/us/home/support/
  2. Telephone assistance from a Canon U.S.A. Customer Care representative free of charge during regular business hours at 1‐800‐OK‐CANON (1‐800‐652‐2666)
  3. Online Repair Product Selection
Canon includes warranty cards/slips with their products.

All Canon professional products are manufactured to the highest quality standards that businesses and working professionals require. And Canon's product warranty and industry leading service and support ensure both peace of mind and years of maximum value for your business.

All professional products sold via Canon USA authorized resellers are covered by a comprehensive product warranty. These warranties provide support should an unexpected problem occur due to a manufacturer's defect. To review the terms of individual product warranties, please click on the links below for details on the coverage provided for each product.
Are camera/lens warranty transferable?
In pretty much all of the PDFs, the second or last page (depending on PDF warranty), right above Canon U.S.A. states the following:
"THIS LIMITED WARRANTY SHALL NOT EXTEND TO ANYONE OTHER THAN THE ORIGINAL PURCHASER OF THE PRODUCT, OR THE PERSON FOR WHOM IT WAS PURCHASED AS A GIFT, AND STATES YOUR EXCLUSIVE REMEDY."
This states that the warranty is valid to the original purchaser. This we all know. However, it also says that the warranty is valid for the person who is receiving the product as a gift as well. For example, if I bought something for a friend and it's a surprise gift, the receipt will have my name and address. Since it's a gift, the warranty will be valid for my friend who's receiving the product in the event it needs to be sent in for repair under warranty. So as long you have a copy of the receipt, it will be enough for warranty repairs. Essentially, this can also apply to used gear that you purchase from marketplaces. You may want to make a copy of the receipt and on the new photocopy, write down that it was a gift and use this receipt to submit with warranty claim. Canon basically wants to make sure that the product is purchased from an authorized dealer.

 What's the word around the internet about Canon?
From what I have read from various forums, Canon is a little more lenient when it comes to warranty claims. If the camera was not purchased from an authorized dealer, a blank US Warranty Card MUST be included with camera and matching serial number in order to qualify for warranty repairs. If you purchased from an authorized dealer, you can submit either a copy of receipt or US Warranty Card.

If you weren't the original purchaser (i.e. you purchased the camera used) and there is still warranty left, Canon will still accept the product for warranty repair so as long you have a copy of receipt from authorized retailer (as per "gift" as mentioned above) and camera has never been registered. If the product has already been registered online or has been serviced previously by the original owner, Canon will reject your warranty claim as you are not the original owner who submitted the first warranty claim.

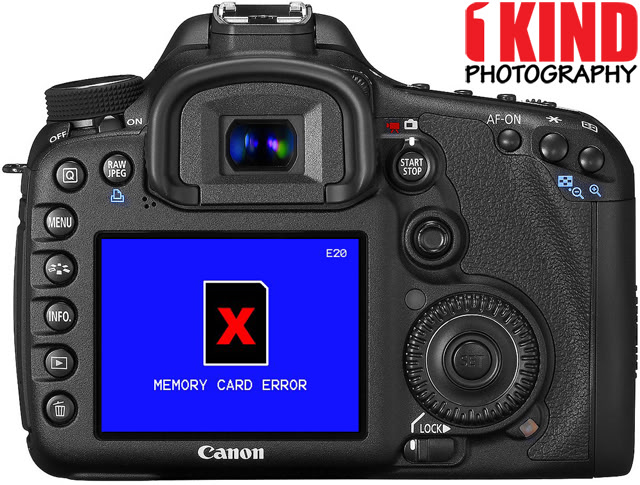
I sent my PowerShot S100 in for repair due to lens error. The lens would be stuck in the extended position and would not retract. I sent it in and they fixed it and camera worked fine but no mention of replacing any parts. Few months later, issue happened again. Sent it back in and this time, they replaced some parts and the issue has not happened again.

I also purchased a refurbished EF 24-70mm f2.8 II lens. It had dust in the lens and since I was within the warranty period, I sent it back to have it cleaned. When the lens came back, it was cleaned and looked brand new.


Complete list of Nikon Authorized Dealers

You may obtain technical support for your Product as follows:
  • Click here to create an account to ask Nikon Technical Support a question.
  • If you have an account and are currently logged in, click here to Ask Nikon a question.
Nikon Technical Support
8AM - 12AM (Eastern)
7 days a week
1-800-Nikon-US
1-800-645-6687
Service and Repair Support
8AM - 12AM (Eastern)
7 days a week
1-800-Nikon-US
1-800-645-6687
Nikon Store Support
8AM - 12AM (Eastern)
7 days a week
1-800-Nikon-US
1-800-645-6687

When it comes to Nikon warranties, it's slightly different from Canon.

Digital SLR Camera Bodies and Coolpix Cameras: No registration or "warranty" card is included or needed with a Nikon D-SLR or Coolpix camera. Keep your original, dated proof of purchase from the Authorized Nikon Inc. dealer in case warranty service is ever needed. These products do include either a mail-in form or a paper with a web link to our registration page:
It's advised to register your product with Nikon so that they can send you information about future updates or service issues that may arise.

Nikkor Lenses: Nikkor lenses come with a standard one year warranty and Nikon Inc. lenses sold by authorized Nikon Inc. dealers will have a Nikon Inc. Five Year Extension*.

* To register for the five year extension, one copy of the included form must be mailed in as indicated. Keep the Customer copy of the form as well as the original proof of purchase (sales receipt).

Nikon 2 Year Extended Service Coverages
Nikon sells Two Year Extended Service Coverages for most Coolpix and D-SLR cameras. (Due to state law, Nikon ESCs are not sold in Florida, Virginia or Washington states.) These coverages extend your original Nikon warranty for two additional years. The ESC can be purchased any time within the original one (1) year Nikon Inc. warranty. Please contact your local Nikon dealer for more information.

It is always recommended that you retain your original sales receipt or copy of your credit card statement as proof of purchase.

Is the Nikon USA warranty valid outside the United States?
The Nikon USA warranty on film cameras, lenses, and speedlights will be honored by Nikon-authorized service centers outside the United States as long as you have the yellow copy of the Nikon USA warranty and your sales receipt from a dealer in the USA. The key to the validity of the warranty is a sales receipt from the country in which you purchased the equipment. If you purchase equipment in another country where the Nikon Worldwide Warranty applies, copies of the sales receipt and this warranty are necessary to obtain warranty service in the USA. Buying the equipment with a Nikon Worldwide Warranty in the United States is not recommended because that warranty is not valid in the USA without a sales receipt from an overseas dealer, and it is not valid outside the USA with a sales receipt from a dealer in the USA.

 What's the word around the internet about Nikon?
From what I have read on various forums, Nikon is a lot stricter when it comes to warranty claims. They will not accept warranty claims unless the product was purchased from an authorized dealer.

A family member sent their 85mm f1.8G to Melville, NY, to have it repaired under warranty because of an internal spring has popped out. Nikon returned the lens with scratches and dust on the rear glass and the spring issue was not repaired. He sent it back again and it was returned the same way it was sent...unrepaired. Sent it back for a third time and when it was returned, this time the spring was removed but rear glass still had scratches and dust galore. At this point, the lens is considered a "lemon" (according the the representative at Nikon). It took awhile and a lot of failed promises, but eventually he was given a brand new lens complete in box. Warranty of new lens continued from whatever the original lens had left. During the entire ordeal of sending the lens back and forth, he asked to speak to a manager. Either the manager was not available or there was no manager. How do you not have a supervisor on hand?

For me on the other hand was a different experience. I dropped off my Nikon D7000 in person to the Melville, NY office to clean my viewfinder as it had hair particles inside that I couldn't get out with a Giotto's Rocket Air Blower. They accepted my camera with receipt (they almost forgot to ask for the receipt until I asked if they needed it). They fixed and returned my camera with no issue.


Camera Tips: What is ISO?


ISO is actually a common short name for the International Organization for Standardization. In the 35mm film days when you bought film, you would buy film that was rated as 100, 200, 400, etc. These numbers referred to the films sensitivity to light. The higher the ISO, the more sensitive it is to light. When you wanted to change the ISO, you would change your film roll. As technology advanced, ISO is now a setting you adjust on your camera.

The first thing you have to understand is that ISO is only one third to taking a properly exposed photograph. The other two thirds is aperture and shutter speed; these are one of the most vital elements to get the know-how of in photography world. Each one can be changed individually to allow you to set then to what you think will give you the perfect exposure, or you can let the camera set them for you to what it thinks is the perfect exposure for the conditions it can detect. Aperture allows how much light the lens captures. Boosting the ISO lets you shorten the amount of time it takes the shutter to open and close, making it possible to freeze motion. There are some instances where you may want to lower the ISO and use a longer shutter speed. Landscape photographers sometimes use this technique to smooth the appearance of a waterfall or a river flowing.

ISO can be as low as 100 to as high as 25,600 depending on the camera. Why is high ISO needed? For indoor work, where flash isn't allowed and the light levels are fairly low. The higher you boot your camera's ISO, the more noise you introduce into your images. Digital noise is the same as film grain. Lots of noise is great for artsy shots or for a retro look but you'll want to avoid noise for portraiture, family snap shots or events. For these, you'll want crisp and clean images. To get these crisp and clean images, you should always try and keep your ISO set to the lowest number and use aperture and shutter speed to get the right exposure. If you can’t do that with aperture or shutter speed, move up to the next ISO setting and try again until you get an image you're satisfied with.

You can also find Auto ISO option on most of the latest DSLR’s available on the market today that functions wonderfully in dim light areas. The flexibility this setting offers is that you can set the highest ISO number so that regardless of the ISO increasing on its own based on lighting of the environment, it never goes beyond the set limit.

When you're shopping for a new camera, it's important to not only look at the highest ISO that is possible, but read reviews to see how the camera performs at that setting. Although two cameras can shoot at the same ISO 3200, one cameras sensor may be larger than the other and can capture a clean image through an ISO of 1600 while the other can capture the same image at a lower ISO of 200. Due note that the top level cameras from Nikon or Canon will have better control over noise than the cheaper models.


Camera Tips: Flash Photography


If you have ever taken flash photos (we don't mean with the flash on your camera - we mean flash units that connect to the hotshoe on top of the camera), we all know that the flash needs to recharge before you can take another shot. Of course, if you have a high-end flash with a battery pack, you won't have to worry about it because the refresh rate would be quicker. But if you're using AA batteries, there is something you should know and will help you...

If you've taken flash photos and you've noticed that it takes forever before you take another picture, its because your flash is dumping a lot of power and the battery needs to recharge before the flash can fire again. One of the major reasons why it takes a while to recharge is because your ISO is set to a low number and is dumping a lot of power.

When your ISO is set to a low number, it needs more light to capture the image. The same applies to flash photography. When you use a low ISO, your flash has to output more power in order to expose your image properly. To prevent the high-output, lessen battery usage and be able to shoot flash photography quicker, you will need to increase the ISO. When you increase the ISO on your camera, it does not need as much light meaning your flash will not output as much power. This results in faster recharge and faster flash photography.

We highly suggest getting Sanyo Enloops if you have not already purchased. You can get them at Amazon, B&H Photo and Adorama.


Tutorial: How to Install Herringbone Heritage Leather Hand Strap Video Tutorial


A couple days ago, we posted our unboxing video of the Herringbone Heritage Leather Hand Strap. As shown in the video, the manual is in Korean. And who reads manuals these days especially for accessories?

But today, we have for you a step by step video tutorial on how to install the Herringbone Heritage strap on to your camera whether its a Canon, Nikon, Sony, Pentax, etc.

Be sure to follow us on YouTube, Facebook and Twitter for latest videos, news and reviews.


How to Setup and in Action Video of Glidecam XR-2000


We posted an unboxing video of the Glidecam XR-2000 not too long ago and now we have two new videos for you. The first video will show you how to setup the Glidecam XR-2000 Series. Unfortunately, it doesn't tell you how to balance and configure it.

For a video on how to set up the Glidecam, check out the video on Philip Bloom's website and check out these videos from NAB 2011 - Video 1 of 3, Video 2 of 3, Video 3 of 3.


The second video shows you the Glidecam XR-2000 in action after it's been set up and balanced. NOTE: I am not a "professional" and have not mastered it yet but with a little more practice, I would have no problem using it.


We'll have a full review of the Glidecam XR-2000 shortly. Be sure to follow us on Facebook and Twitter to be notified when the review has been posted.


How to Tell a Difference Between a Genuine and Counterfeit Nikon Lens Filter


So I purchased a brand new Nikon 77mm NC filter for my Nikon 24-70mm f2.8G to protect the lens from dings, scratches and elements (I know there are people who dislike filters because it degrades the image quality but its nothing Lightroom can't fix considering I'll be post processing the image anyways. The filter I purchased was from eBay and the seller was located in Hong Kong. My gut instinct told me that it was more than likely a fake but the seller had a reputation and the price was affordable. So I took the chance.

Having received the filter, it looked very well made and legit. I did some searching online to see if anyone had compared an authentic filter to a counterfeit. There wasn't much information but from what I've read and the minimal information available, it had all the information of a real filter. I decided to go out and purchase a Nikon 77mm NC filter from an authorized Nikon retailer just to compare for myself since there was no definite answers or comparison pictures available on the web. When you purchase from an authorized Nikon retailer such as B&H Photo and Adorama, you know its legit. Amazon is legit as well but you have to make sure its "Sold by Amazon.com" and not from a third party seller that says "Sold by...and Fulfilled by Amazon.".

The fake filter and packaging is almost identical that it can pass as real to an average buyer. The only way someone would know is if they had the real product next to them to compare. But this tutorial will help tell you whether or not what you own/purchased is the real thing since there is nothing on the web...until now. This would probably apply to ALL Nikon filters.

Take a minute and look at the picture below. Can you tell which is real and which is the fake? Rollover the image to find out the answer...


Did you get it right? I'll explain how to tell the which is real and which is fake below.

*NOTE: I know there's no real way of comparing filters unless you have an authentic one next to you to do a side by side comparison. Hopefully this tutorial will pin point some areas that you can definitely recognize as a potential counterfeit. Granted, filters is just a piece of glass but please purchase your OEM battery grips, batteries and battery chargers from authorized dealers. Counterfeit items can cause damage to your camera. Why risk saving a few bucks when you can be losing more? If the price is too good to be true, it probably is.

As you can see from the front of the package, it looks identical. But there are slight differences. The bars at the top and bottom are different shades of gray. The Nikon logo on the real package (left) is vibrant and in the middle of the gray bar. The Nikon logo on the fake package (right) is dull and at near the top edge.


The back is similar to the front. The UPC both have the same number and barcode but to the naked eye without comparing side by side, they are the same. But the fonts are slightly different. The real label is slightly bolder. You can also tell that the yellow on the real package is yellow where as the fake package was more orange looking. The gray also bleeds into the hang tab on the fake.


The sides look about identical. However, I did notice that the end of the packaging where they seal the package looked different. On the fake package, it had a square edge. On the real package, it had a trapezoid edge. You can see my outline of where the edge is.


The same differences found on the front of the package can be seen on the top and bottom. Dull colors and different shades of gray. The real package looked a bit more transparent.


The instruction manual looked identical but definitely completely different and noticeable without needing to compare. The fake instruction manual is thicker and white as if it was printed on normal printing paper. The real instruction manual was thinner and more transparent and had a newspaper feel to it. The way it was folded is also different. I pointed out where the front of the manual is and had them face the same way. You can see that the way the manual was folded is different. I didn't bother unfolding the manuals completely as these were enough to show the differences. And who really reads them?


The front of the filter case looks exactly the same. It has the Nikon logo, CP-15 and 77mm, all molded into the case. You can also see that the real case is slightly more transparent (clear) where as the fake case is more opaque (cloudy).


On the back of the case, both have "MADE IN JAPAN" molded into the case but one small thing is different. >PP< is molded on the inside of the real case. On the back of the case, its looks backwards (as shown in picture). This is not molded on to the fake case.


But most importantly is the filter itself. Both are glass and you can tell by the weight and by tapping it. But from what I've read online when I did my search to see how I can tell if it was real or fake was to take a look at the font for the Nikon logo. It's hard to tell if its correct or not when you have nothing to compare it to. As you can see from the image, the Nikon logo is ever so slightly different and so are the colors. The logo on the real filter is slightly more bold. The "Nikon NC 77mm MADE IN JAPAN" is also closer together where as the fake is more spread apart and is missing "MADE IN...". The "77" is slightly different as well. On the real filter, it has a curved bottom where as the fake is straight.


When laid flat side by side, the real filter is slightly thinner than the fake filter.

You must ask, how am I sure that its fake and not real? There are a lot of differences between the two. The real filter was purchased from an authorized Nikon retailer. When items are manufactured, they are all consistent in packaging and design when it comes off the production line, especially when they are "Made in Japan". They never vary. I can go to a different authorized Nikon retailer and it would be identical to the one shown above. The fake looks real when you have nothing else to compare it to but they always leave out things that make it stand out without the need to compare it to something (I.E. manual).

Other than packaging and filter appearance, is there any difference in the quality of pictures? Honestly, I couldn't tell a difference. Even just placing both filters on a white piece of paper, they both looked clear. As stated in the beginning, there's nothing a little post processing in Lightroom, Aperture, Photoshop or other photo editing programs can't fix or adjust.

Want to avoid being scammed? Avoid purchasing filters from eBay...especially from sellers in Hong Kong, China or Asian countries. These are where counterfeits usually come from (just look at all the fake Sandisk memory cards on eBay). For sense of security and comfort, I highly recommend purchasing real filters from B&H Photo or Adorama. You can't go wrong.

B&W filters is another filter that has fakes and is highly copied.

------------------

This article was featured on NikonRumors, Fstoppers, Crave Asia (Asia CNET), Crave CNET, UniquePhoto.


How to Customize Identity Plate in Adobe Lightroom


Did you want to customize your Lightroom so that it shows your graphical brand logo or text logo and change the color of the module picker like below?

Rollover image

We are going to go over how to customize the Identity Plate in Adobe Lightroom 3 with both a text based logo, as well as a graphical logo.

Adobe Lightroom allows you to customize the Identity Plate in order to create a seamless experience when it comes to your product branding. This is particularly useful if you are using Lightroom to present images to clients, that way they will get the impression that the software is customized and personalized, rather than just a normal off the shelf type product.

The Identity Plate that appears in the top left of the Lightroom screen is configured by selecting Edit > Identity Plate Setup on Windows.

If you're on a Mac OS, choose Lightroom > Identity Plate Setup).

Rollover to zoom

 TEXT LOGO IDENTITY PLATE:
To create a simple text logo Identity Plate, choose Use a stylized text identity plate and type the text into the text area. You can select and format the text in the font, font size and color of your choice. Click the Enable Identity Plate checkbox and the changes you make will appear in place so you can check how they look. You may need to size the text to fit the space. Unfortunately, Lightroom won’t scale it to fit automatically.

You can also change the text style, size and color of the module picker. The module picker is the tabs located on the top right of the program that have the Library, Develop, Slideshow, Print and Web buttons.

Rollover to zoom

To save the Identity Plate, choose Save As from the dropdown list and type a name for the Identity Plate.

 GRAPHIC LOGO IDENTITY PLATE:
If you prefer to use graphics in your design such as your signature or a graphical design element, you can create a graphical Identity Plate in another application such as Photoshop. The file you create should be no more than 46 pixels in height (Windows) and 57 pixels (Mac OS), so it fits in the space available. Anything higher will get cut off. There is also no option to scale it to a smaller size in Lightroom. So if the image is too big, you have to go back to your program such as Photoshop, resize and re-save the image. As for the width, it can be as long as 1200px. Of course, the wider it is, the more space it will take up. The module picker on the right will overlap your logo. The width size will vary depending if you have your Lightroom in full view, screen resolution and how big your display monitor is.

When creating your Identity Plate in an application like Photoshop, build it in a layered file and make sure the bottom layer is black. This will match the Lightroom interface. The reason for this is so that you can see how it will look when placed into Lightroom. When you are satisfied with the graphic, turn off the visibility of the black background layer and save the file as a .png, .psd or another format that maintains transparency (not jpg). If you save as a .jpg image, the transparent background will be white.

Back in Lightroom, open the Identity Plate Editor and choose Use a graphical identity plate, click Locate File and browse to find the file on disk. You can also change the module picker if you want to.

Rollover to zoom

Save this Identity Plate so you can always reuse it if you change the Identity Plate in the future.

You now have a personalized Lightroom with your brand logo or name of your company that is unique. If you haven't purchased Adobe Lightroom yet, you can purchase the software from Amazon, B&H Photo or Adorama.


How to Perform a Stress Test on Your Memory Cards


In our previous post, we gave a list of programs that can help recover lost, deleted or corrupt memory cards. All storage devices have a potential of failing and being corrupt. They can fail on you at any time especially on the crucial moments or they won't. It would be hear wrenching to take your pictures of your family or for a client and all of a sudden, you lost them all due to a memory card failure.

But what if there was a way to lower the chances and try to prevent any corrupt data or faulty memory cards before you start taking your pictures or at a big event. Granted, the recovering of images can bring it back but it may not bring back everything or anything at all. At the same time, why give yourself a heart attack or stress?

To try and prevent any corrupt files, you can perform a test on your memory card by downloading any of these programs:


http://www.speedtools.com/IntegrityWin.html
($14.95 - PC only or $24.95 - PC & MAC)


Tutorial: How to Use Rakuten (Ebates), Mr. Rebates and CouponCabin Cashback Site


Mr. Rebates
Mr. Rebates
Mr. Rebates

I use to walk into Best Buy, Foot Locker, Express, Walmart, Target and other stores to buy my stuff whether it be for birthdays, Black Friday, Christmas, Valentines, anniversaries, etc. But how can you save when they charge tax and don't offer much of a discount especially if you're looking for something specific? For me, I prefer to shop online for all my stuff whether its camera gear, home or personal products unless I have no choice or the store actually has a better deal.

I've been using Rakuten (formerly known as Ebates), Mr. Rebates and CouponCabin for quite some time. These are the two main cashback sites that I use often. There are a bunch of other cashback sites as well. I tend to compare between the two to see which one offers a higher cashback percentage. Sometimes, one cashback site is offering BONUS percentage and the other is not or one just has a higher cashback. So I have the flexibility of going to either one but definitely compare both to see which offers a better percentage.

Here is a list of some eligible stores out of over 2,000 stores:
  • Abe's of Maine - 2%
  • Abt Electronics - 2%
  • Adorama - 3%
  • Amazon - up to 7%
  • Apple - 1%
  • Beach Camera - 2%
  • Best Buy - up to 2%
  • Buy.com - 3%
  • BuyDig - 2%
  • Canon - 3%
  • Crutchfield - 2%
  • Dell Home - 3%
  • eBay - up to 5%
  • Groupon - up to 8%
  • Newegg - 1%
  • Samy's Camera - 2%
  • Sears - 3%
  • Target - 3%
  • TigerDirect - 4%
  • Unique Photo - 1%
  • Walmart - 2%
  • And many many more!
Cashback % may change without notice.

Here are some examples of my purchases: I purchased two (2) Nikon D7000's and spare batteries from Abt Electronics and received $51 in cashback. Another example was ordering $1160 worth of gear from Canon and was able to get back $47 in cashback. I've even purchased items that were a couple bucks and got back as a couple of cents in cashback. It may not sound like much but when you start accumulating the cashback, it adds up quickly.

I've even gotten cashback for purchasing hotels, car rentals and airline tickets for vacations or business trips. If you're purchasing online regardless of what it is, there's going to be cashback.


You can save pretty much on anything...electronics, baby stuff, furniture, clothing, even Groupon and eBay!

Enough with the talking, how to do I use RakutenMr. Rebates and CouponCabin so I can start saving!?


Related Posts Plugin for WordPress, Blogger...